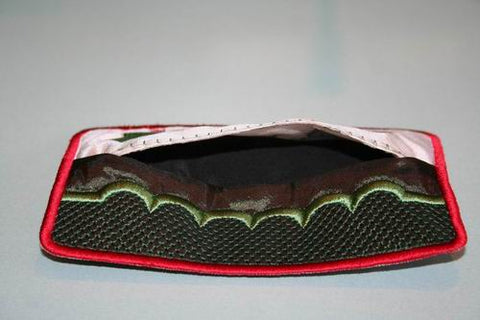
In this tutorial we teach you how to complete this
In The Hoop Tissue Pocket, step by step.
This Project Consists of 4 Sections:
- 1st Half: Steps 1-8
- 2nd Half: Steps 9-12
- Back Section: Steps 13-22
- Finishing Touches: Steps 23-29
Step 1. Hoop only the 2-3 layers water soluble stabilizer. Stitch 1st color stop.
Step 2. Cut fabric on fold (thus double this size) as well as 1 x thin batting (the size here indicated) 
Step 3. Fold batting inside the fabric (sandwiched) – embroidery adhesive spray will keep all in place.
Step 4. Place this “sandwiched fabric /batting with the folded side to the 1st HALF of the running stitch in the hoop.
Step 5. Make sure you place the fabric on the indicated line – not over and not short of this line.
Step 6. The next zigzag stitch will secure the fabric and batting in place.
Step 7. Stitch the rest of the design.
Step 8. When the design is complete – we will do the same on the next side.
Step 9. Place this “sandwiched fabric(contrast fabric) /batting with the folded side to the 2d HALF of the running stitch in the hoop.
Step 10. Make sure your fabric overlaps this time the 1st fabric (slightly).
Step 11. The contrast fabric will now be secured in the hoop.
Step 12. Stitch the rest of the design.
Step 13. Remove hoop and by using adhesive spray, secure one layer of fabric.
Step 14. …one layer of batting and again .
Step 15. …another layer fabric to the BACK of the hoop. (This way your pocket will have a neat lining) .
Step 16. Place hoop in embroidery machine and the next stitch will secure the fabric in place.
Step 17. Remove hoop and cut away ALL excess fabric from the front.
Step 18. Front view after excess fabric has been cut away.
Step 19. and cut away all excess fabric from the back of the hoop.
Step 20. Rear view after excess fabric has been cut away.

Step 21. Place hoop back for the final satin outline.

Step 22. Satin outline complete.

Step 23. Remove design from hoop.

Step 24. Cut away all excess water-soluble stabilizer.

Step 25. Rear view after all excess water-soluble stabilizer has been cut away.

Step 26. With sharp scissors cut open the stabilizer in the center.

Step 27. Be very careful, not to cut through the back panel.

Step 28. Your “In-The-Hoop” Tissue Pocket is complete.

Step 29. Insert Tissues and you have a beautiful and practical gift.


