- Home
- New Designs
- On Sale
-
Themes
-
Tutorials
- Blog
- Help & FAQ
- Contact Us


Create your own cozy slippers with this easy step-by-step tutorial!
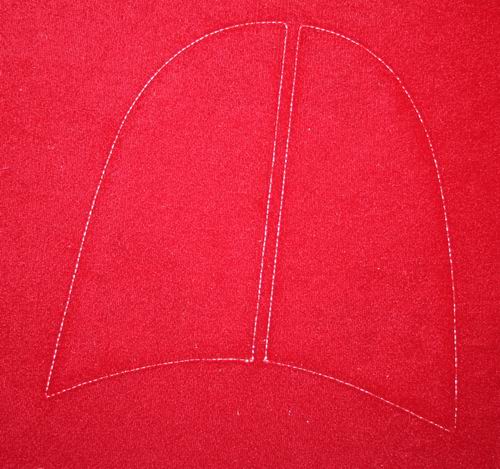
The first color stop stitches the placement line, showing exactly where to position the batting and top fabric.

Place the batting over the placement line, then place the top fabric on top of the batting.

Stitch the second color stop. This secures both the batting and top fabric to the hoop.

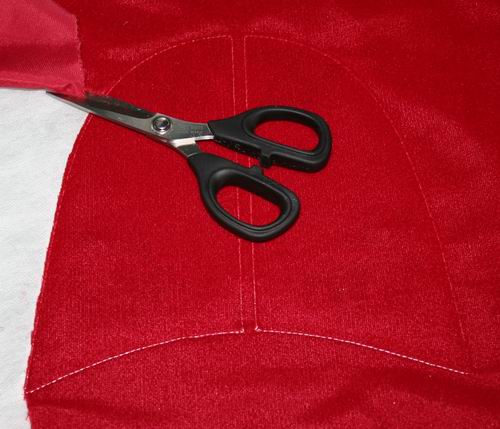
Carefully trim away the excess batting and fabric close to the stitching line.

Your project should now look like this.

Remove the hoop from the embroidery machine without removing the fabric from the hoop. Turn the hoop over.

Place the lining fabric (we used leather for this sample) over the placement area on the back of the hoop. Use a temporary fabric adhesive spray to hold it securely in place. This will become the sole of your slipper.

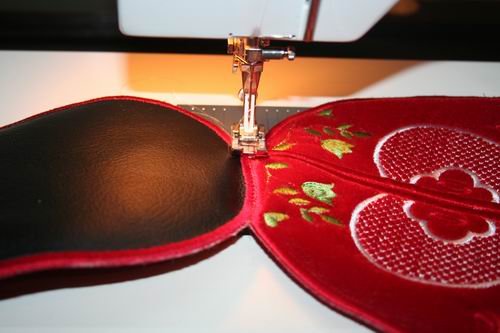
Return the hoop to the embroidery machine and stitch the next color stop. This secures the lining to the sole. Remove the hoop from the machine without disturbing the hooped fabric.

Trim away the excess lining (or leather).

Your project should now look like this. Return the hoop to the embroidery machine and stitch the final color stop, which creates the satin border.

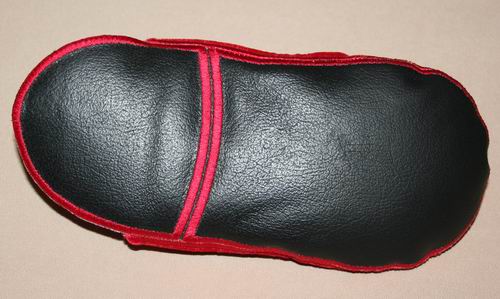
Your slipper sole is now complete. This is what the underside looks like.

This is what the inside of the sole looks like. Remove the project from the hoop and trim away the excess stabilizer. Set the completed sole aside until the assembly steps.

The first color stop stitches the placement line for the batting and top fabric.

Place the batting over the placement line, then place the top fabric on top.

Stitch the second color stop to secure both layers.

Continue embroidering the design by following the color sequence shown in the PDF, or customize it with your own color choices to match your fabric.

Trim away the excess batting and fabric.

Your toe panel should now look like this.

Remove the hoop from the machine without disturbing the hooped fabric and turn it over.

Place the lining fabric (we used the same fabric as the top) over the placement area. Secure it with a temporary fabric adhesive spray.

Return the hoop to the embroidery machine and stitch the next color stop to attach the lining. Remove the hoop from the machine without disturbing the hooped fabric.
Trim away the excess lining fabric.
Return the hoop to the embroidery machine and stitch the final color stop, creating the satin border.

Your completed toe panel should now look like this. Remove it from the hoop and trim away the excess stabilizer.
.

Lay out all the completed panels, separating the left and right slipper pieces.
Using a zigzag stitch on your sewing machine:

Mark the center front of each slipper sole.

Starting at the center front, use a zigzag stitch to sew one side of the toe panel to the sole.
Your slipper should now look like this.

Again starting at the center front, sew the remaining side of the toe panel to the sole, completing the slipper.

Congratulations—your slipper is finished!

This is what the finished sole looks like.
And here's your completed slipper!

These slippers make a thoughtful gift and are a wonderful way to replace a worn-out pair with something uniquely yours.
For this tutorial, we used our Slippers My Love embroidery design.
Browse our website for a variety of slipper embroidery designs.
Comments will be approved before showing up.

This tutorial demonstrates a placemat stitched in 2 hoopings (two halves). The same alignment technique can be used for designs requiring 4 hoopings.

Stitch a fabric basket — a structured, free-standing organiser.

Choose one size — A, B, C, or D — and stitch all panels for that size before moving to assembly.


