

- Home
- New Designs
- On Sale
-
Themes
-
Tutorials
- Blog
- Help & FAQ
- Contact Us

Think of all the wonderful reasons why you simply have to try this new Creative Panel. Dream Big - a fitting name for a magnificent design enhanced with an array of beautiful stitches.
We want you to succeed, so with these few basic steps you can complete your very own master piece!
Question 1 : Do I need to purchase the panel to try this design?
No, not at all. This design looks just as fabulous on plain fabric. See our photos where we stitched on a turquoise color fabric and the results were still amazing.
Question 2: Is it difficult?
No, it is not difficult, but you have to be consistent and follow 3 basic steps:
1. The orientation should ALWAYS stay the same. What do I mean? With the printed panel the name "Dream Big" A Hoffman Spectrum Print by Jeanie Sumrall-Ajero, should always face you. Throughout the embroidery project, keep this orientation and DO NOT rotate the panel. When using plain fabric I used a contrast color ribbon attached to one of the four sides with a safety pin.
2. Each design includes a printable template. This clearly shows the center of the design as well as the X and Y axis. When you keep to these 3 markers, your design will stitch out well.
3. Prepare before you stitch. Print and cut out all the PDF design files. These templates will guide you to complete this project successfully.
Ready and excited? Enjoy stitching!
You need:
1.
Prepare your fabric. We used spray starch and ironed the panel to ensure a flat wrinkle free surface.
2.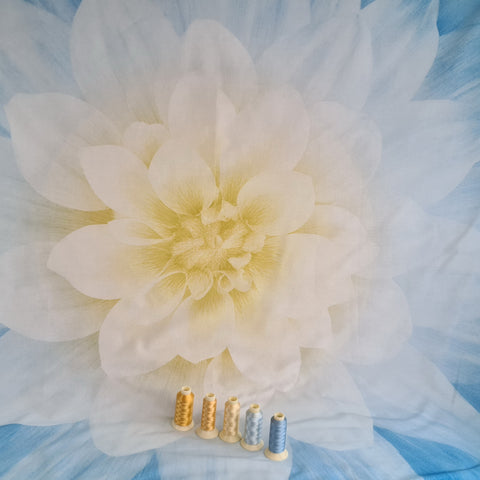
Choose your thread colors.
3.
We used cut-away stabilizer, but you can also use water-soluble stabilizer.
4.
Temporary adhesive spray works well to keep all the layers together.
5.
We used safety pins all around the outer edge for additional securing of the layers
6.
Print, cut and sort all your templates.
7.
If you find that the x and y axis are difficult to see, mark them clearly.
8.
The center point if most important, as this is the starting point.
9.
Use markers to keep track of your progress.
10.
Your stabilizer is hooped and your panel placed on top of the stabilizer inside the hoop. Place the design template (in this case number 1) to match the print on the panel.
11.
When you are happy with the placement, mark the 4 corners.
12.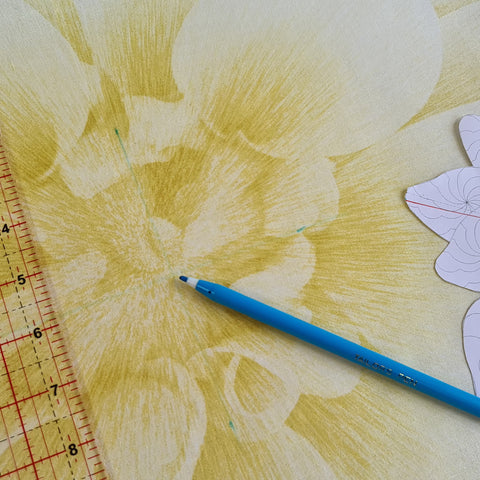
Join the dots to determine the center point. The X axis should line up with the X axis of your hoop and Y axis with the Y axis on your hoop. The needle should start in the center.
13.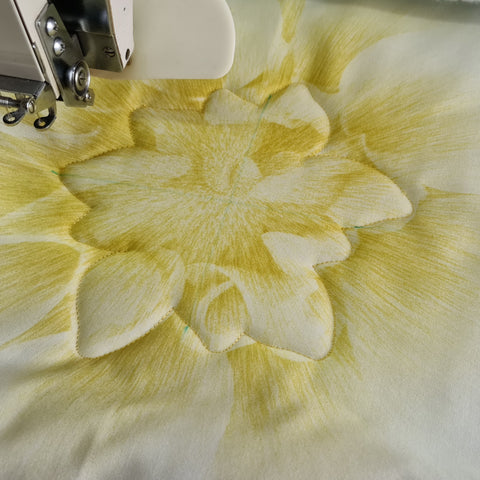
We included an additional color stop, a running stitch to help you with alignment. If you are happy, proceed with the design, if not, this running stitch is easy to remove and reposition your design.
After each design is stitched, remove the design from the hoop. Cut away the excess stabilizer from the back of the hoop. Rehoop with new stabilizer and proceed with the next design.
Remember to keep the orientation of the fabric the same with all designs. Do not rotate the fabric.
14.
Hoop stabilizer and you are ready for the next stitch out. Very Important: Remember the name of the panel should always face you and the orientation of the panel should be kept the same throughout the process.
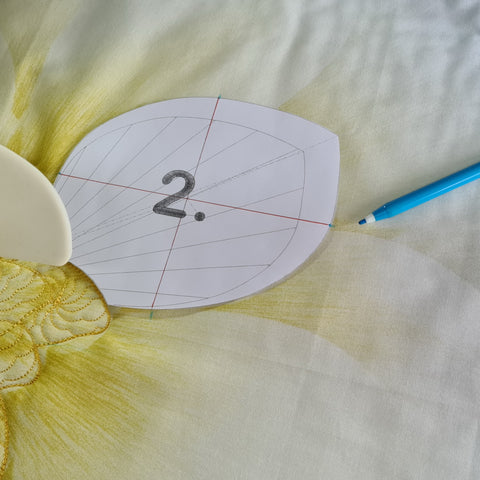
Again, place your template no 2 to match the print on the fabric as well as the previous embroidery. Mark the 4 corners, Join the dots to determine the center point.
15.
16.
The X axis should line up with the X axis of your hoop and Y axis with the Y axis on your hoop. The needle should start in the center.
17.
Stitch the 1st color stop = a running stitch. When you are happy with your placement, stitch the design or remove the running stitch and reposition your design.
18.
Mark the designs you have completed.
19.
Tip: Place the neighboring 2 templates on the printed panel to determine if the one you are about to stitch is correctly positioned.
20.
The results are amazing and well worth the effort. Carpenters have the saying "Measure twice - Cut Once" this advice came to good use in stitching this project "Measure twice - Stitch Once"
For any questions, you are welcome to use my personal e-mail (below).
We look forward to seeing photos of your Panel!
Happy stitching!
Annemarie
annemarie@astitchahalf.com
Choosing the Right Design for Your Hoop:
For 9" x 14" hoop owners: Select the "Dream Big Hoffman Panel French Blue 9 by 14 hoop size" - this version is perfectly sized for your larger hoop.
For 8" x 12" hoop owners: You have two great options:
Not sure which to choose? Consider the bonus option if you'd like extra versatility and value - you'll get the main design plus two additional sizes to experiment with!
Feel free to reach out if you need help deciding which option works best for your projects!
Comments will be approved before showing up.

Stitch a fabric basket — a structured, free-standing organiser.

Choose one size — A, B, C, or D — and stitch all panels for that size before moving to assembly.

assemble your lantern using a sewing machine, hand stitching, or a glue gun—choose the method you’re most comfortable with.


Tammy W
July 24, 2025
I love this design but my machine has maximum size of 5.9 × 14. Do you have it available for this size hoop? Or could it be manipulated to use this size hoop with more hooping?