• Wishlist
  • Sign Up
  • Log in
  • Cart (0)
  • Checkout
  • Home
  • New Designs
  • Timeless Moments
  • Quilt Progress
  • Themes 
    • All In The Hoop
    • Bundles
    • Earrings
    • Mug Rugs
    • Necklines and Collars
    • Quilting
    • Seamless Repeat Patterns
    • Timeless Moments
  • Tutorials 
    • Photo Tutorials
    • Video Tutorials
  • Blog
  • Help & FAQ
  • Contact Us
FanBroidery Blog

How to: Cutwork Embroidery by Annemarie

February 10, 2020 1 Comment

How to:  Cutwork Embroidery by Annemarie

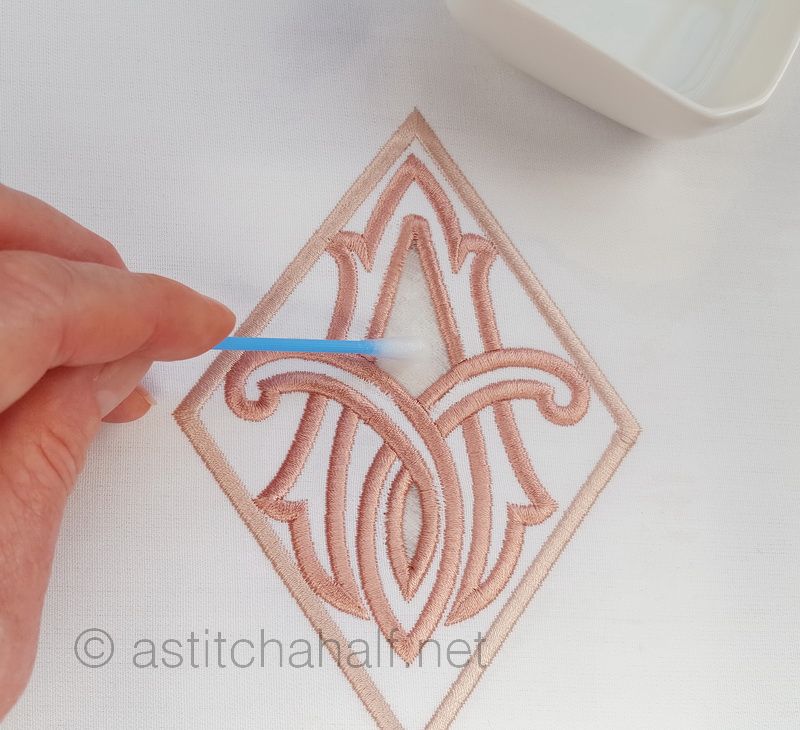
To Complete a Cutwork Design you will need:

  • Stabilizer (use the best stabilizer for the fabric you will be using)
  • Fabric (we recommend a test stitch out for best results)
  • Embroidery Thread (see color chart included with your design)
  • Water-soluble Stabilizer (we recommend a vilene type for best results)
  • Sharp point scissors (to remove any jump stitches)
  • Craft Knife and Cutting mat
  • Embroidery Design (use the correct format for your machine)

  • Hoop your fabric and stabilizer.
  • Stitch the 1st color stop. 
  • Use your craft knife and cutting mat to remove the fabric by carefully cutting between the 2 running stitches.

  • Use your sharp point embroidery scissors if necessary

  • If the design has more than 1 cutwork area, simply repeat the previous steps.

  • Cut away any loose thread
  • Turn hoop over

  • Place a double layer of water-soluble stabilizer on the back of the design (back of the hoop)

  • Use masking tape to keep the water-soluble stabilizer in place

  • Place hoop back in your embroidery machine and stitch the rest of the design.

  • Once the design is complete, remove the hoop and cut away the excess water-soluble stabilizer from the back of the design.

  • Place a towel or face cloth behind the design and use a wet Q-tip to remove the water-soluble stabilizer.

  • Repeat the process if there are multiple cutwork areas in your design.

  • Your Cutwork Project is complete!

I used the Richelieu Cutwork Monogram to demonstrate the Cutwork technique. 

Click HERE for the Richelieu Cutwork Monograms

Click HERE for the Cutwork designs

Happy stitching Friends and we look forward to see your Beautiful Projects!
Annemarie
www.astitchahalf.net
e-mail: annemarie@astitchahalf.com


Tweet Share Pin It Email

1 Response

Heather Schimke
Heather Schimke

January 27, 2023

Thank you for sharing this. I have been wanting to learn how to do cutwork for years. Now I know how to do it.

Leave a comment

Comments will be approved before showing up.


Also in FanBroidery Blog

How to: Dream Big Panel Twisted Hexagon Quilt

January 27, 2026

a quilt that grows beautifully, one block at a time. The Dream Big Spectrum Quilt is a beginner-friendly...

Continue Reading

Customer project: Copper Song Bundle Trivets by Irene

January 22, 2026

Irene said: "Finished off this trivet today despite having a broken left wrist. Hubby helped me a bit and the front was already done before I broken my wrist ...

Continue Reading

Project idea: Quilt with Twisted Hexagon

January 11, 2026

Create a cherished heirloom quilt featuring these precious little girls using...

Continue Reading

Let's be friends
  • Join us on Facebook
  • Join us on Groups.io
Get the NEWSLETTER

Terms of Use

Terms and Conditions

Privacy Policy

About us


© 2026 aStitch aHalf. Copyright All rights reserved. Powered by Shopify

Amazon American Express Apple Pay Diners Club Discover Google Pay Mastercard PayPal Shop Pay USDC Visa