

- Home
- New Designs
- On Sale
-
Themes
-
Tutorials
- Blog
- Help & FAQ
- Contact Us
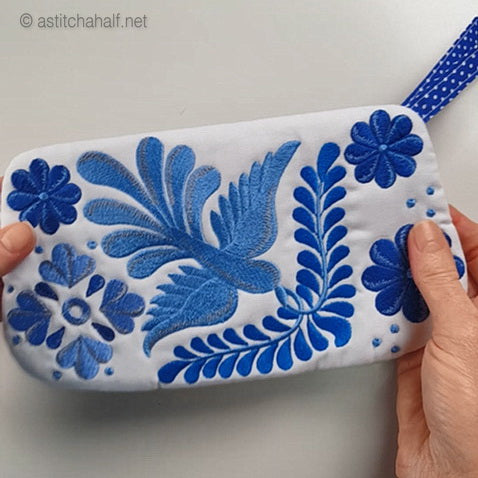
To make this Double Sided and Fully Lined Wrist Clutch You Need:

Embroidery:
Hoop your stabilizer with a small square piece (the size of your actual design) of batting on top.
Place the fabric on top of the batting.
Stitch out the design
Cut 9" square after embroidery is done.
Making the Strap:
Cut Fabric 3” x 12” long. Fold in half (length) and fold each side inward as shown below. Iron and stitch both sides
with matching thread. Keep aside…


Stitch File A first: Simply follow the Color Change sheet included. Cut away excess fabric, keeping approx. 1” fabric all around. Keep aside…


Stitch File B:
1st Color Stop:
Zipper placement is stitched. Place zipper teeth to match the center line. Zipper should face “right side up” as shown below. Use masking tape to hold zipper in place.
2d Color Stop:
Two straight stitches will secure the zipper on both sides. Remove the making tape.


center.
4th Color Stop:
Use Temporary adhesive spray to keep the fabric in place while stitching.


5th and 6th Color Stop:
Stitch the next color stop according to the color change sheet.


7th and 8th Color Stop:
Repeat with the 2d half of the purse: Print and use the file numbered “C” as a template to cut the fabric for the front and cut another set from your contrast fabric for the back.
Iron a seam allowance of approx. 1” on each of the fabric pieces. Place the folded edge to align with the zipper center.


9 through 14th Color Stop:
Follow the color change sheet.


15th through 18th Color Stop:
Place the contrast fabric to the back of the hoop. Use Temporary adhesive spray to keep the fabric in place while stitching.


19th Color Stop:
Before stitching this Color Stop…open zipper halfway and secure “strap” with masking tape. Place “Stitch-out A” on top of “Stitch-out B” – Right sides facing each other. Use masking tape to keep front and back panels in place while
stitching.


20th Color Stop:
Place Contrast Fabric to cover the back of the hoop, and stitch last Color Stop.


Carefully cut away the stabilizer to see the zipper. Open the zipper.


With small hand stitches, close the opening as shown in the image below


Turn purse inside out and shape. Your Wrist Purse is Complete and Fully lined.


Enjoy stitching!
CLICK HERE to view our huge range of Clutch Purses
Comments will be approved before showing up.

Stitch a fabric basket — a structured, free-standing organiser.

Choose one size — A, B, C, or D — and stitch all panels for that size before moving to assembly.

assemble your lantern using a sewing machine, hand stitching, or a glue gun—choose the method you’re most comfortable with.


Anne Aubry
October 20, 2019
This bag is beautiful! I want to buy this design and give it as Christmas gift